How to set the movie as a background?
From AVObjects Knowledge Base
(Difference between revisions)
| (One intermediate revision by one user not shown) | |||
| Line 1: | Line 1: | ||
To set movie as a background in VideoMixer you need to configure the scene to place the background stream to be played behind the foreground. You can test it with Vision Mixer C# sample. Here is a sequence of actions: | To set movie as a background in VideoMixer you need to configure the scene to place the background stream to be played behind the foreground. You can test it with Vision Mixer C# sample. Here is a sequence of actions: | ||
| − | + | * Run the Vision Mixer C# sample. | |
| − | + | * Create new project. | |
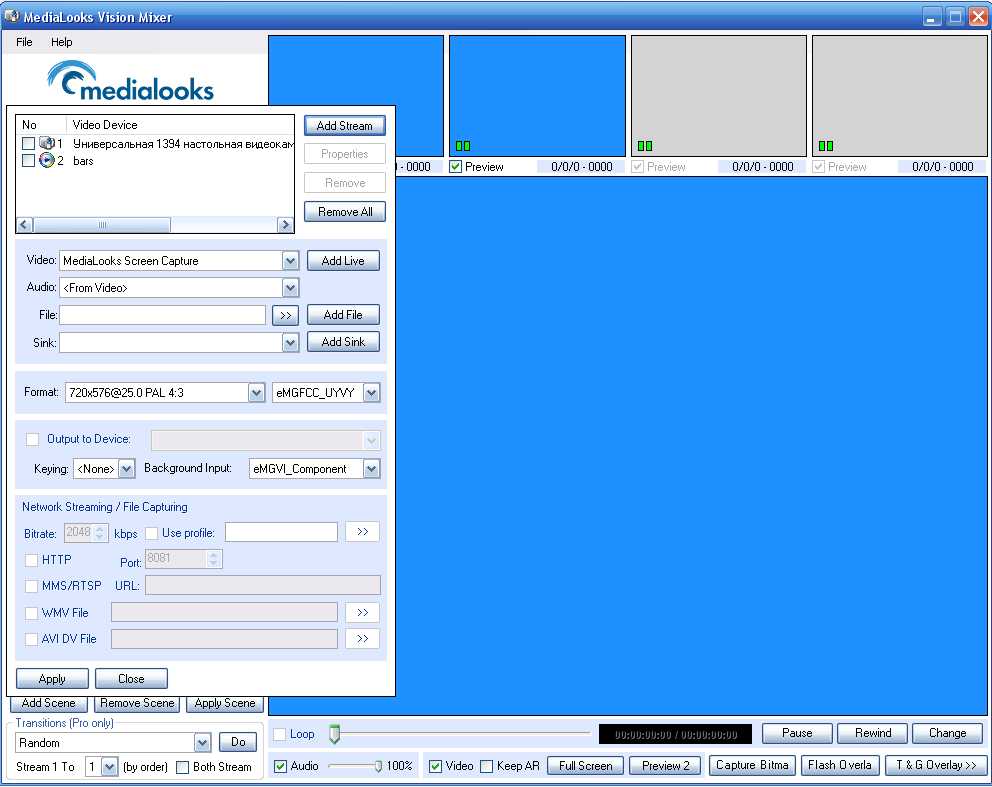
| − | + | * Add two streams: background and foreground. It can be files, live streams or pictures. | |
[[Image:BackMixer1.jpg]] | [[Image:BackMixer1.jpg]] | ||
| − | + | * Press "Apply". Now you have 2 streams but if you'll choose one of them it will be played separately. Let's ceate a csene where this streams will be placed one above another. | |
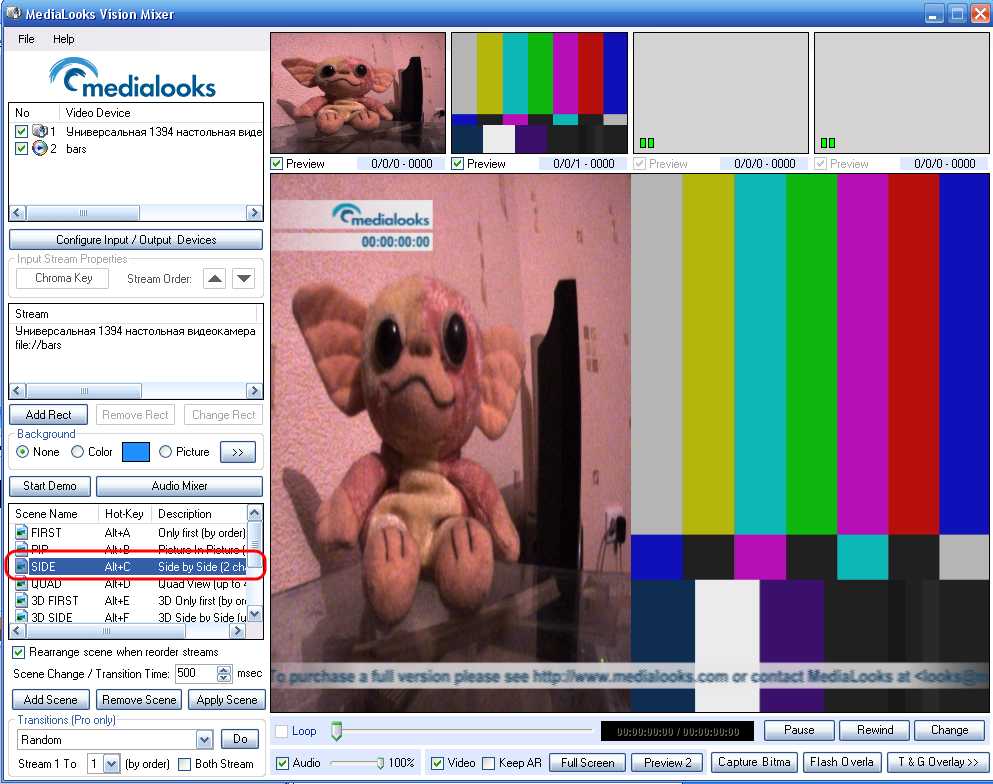
| − | + | * Select a "SIDE" scene in a scene list - we will modify it to create our scene. You see that you have both of your streams on the preview screen side-by-side. Now le's place them one above another. | |
[[Image:BackMixer2.jpg]] | [[Image:BackMixer2.jpg]] | ||
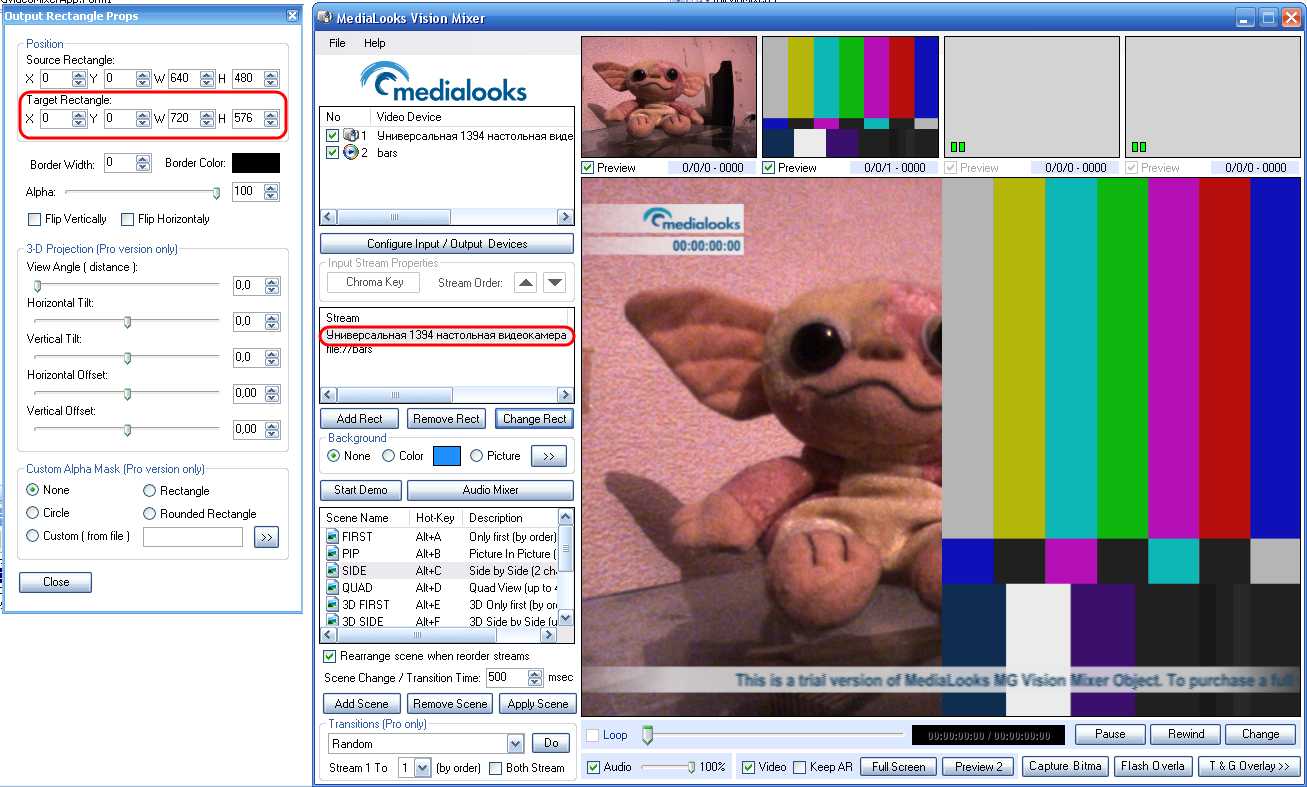
| − | + | * Choose the first rect in a rect list and press "Change rect" button. | |
| − | + | * You see that Target Rectangle takes only a half of the output screen. Configure it for it took all the screen area (for example 720x576) and close the configuration window. | |
[[Image:BackMixer3.jpg]] | [[Image:BackMixer3.jpg]] | ||
| − | + | * Do the same with the second rect in a list. | |
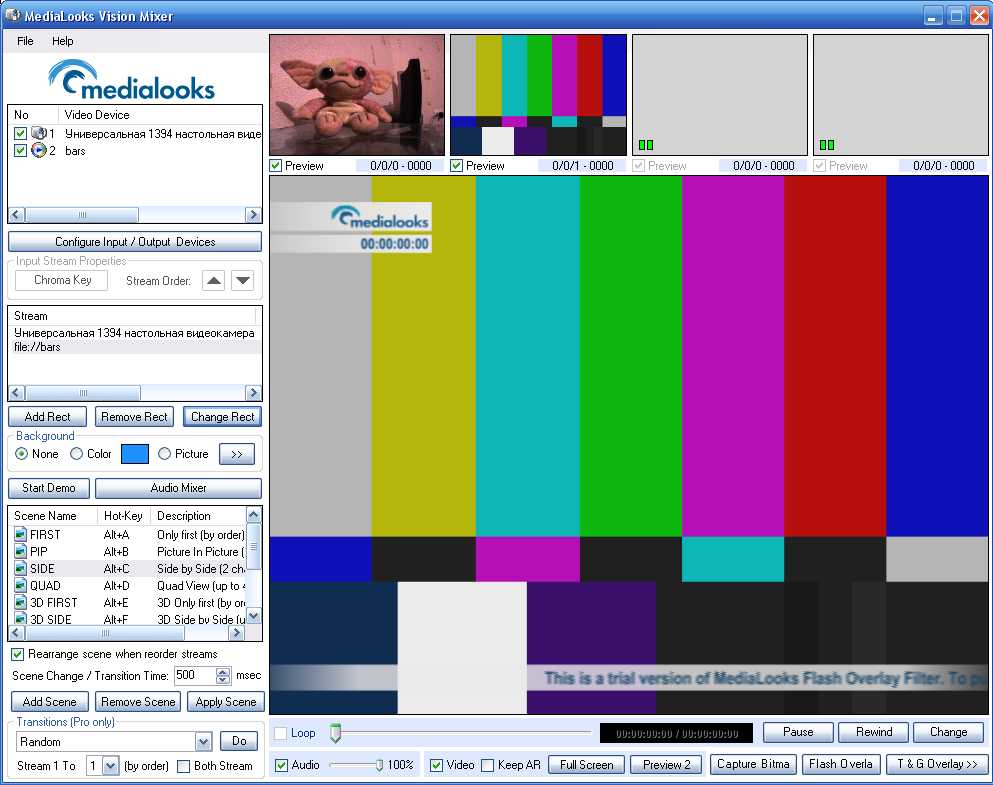
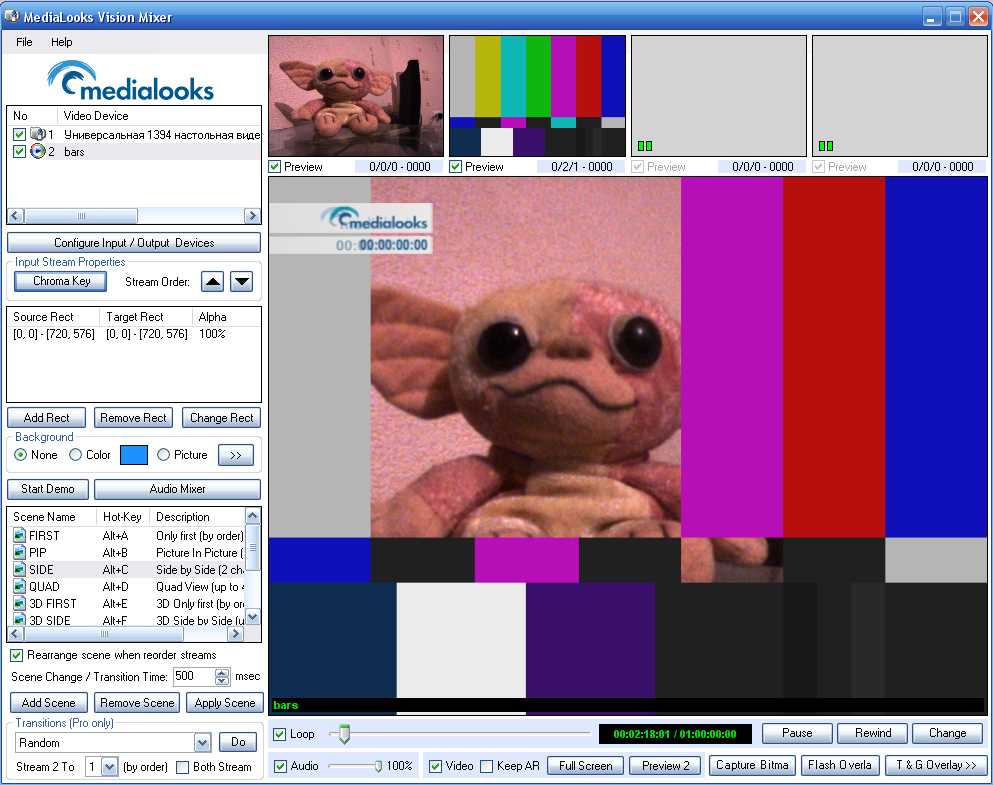
| − | + | * Here it is - you have one stream above another! Save this scene ("Add scene" button) to pass the configuration stage next time. | |
[[Image:BackMixer4.jpg]] | [[Image:BackMixer4.jpg]] | ||
| − | + | * Now you can configure the chroma key for the foreground stream (http://wiki.medialooks.com/How_can_I_test_your_chroma_key%3F). You will have a chromakeyed stream on a movie background. | |
[[Image:BackMixer6.jpg]] | [[Image:BackMixer6.jpg]] | ||
Latest revision as of 18:18, 2 April 2010
To set movie as a background in VideoMixer you need to configure the scene to place the background stream to be played behind the foreground. You can test it with Vision Mixer C# sample. Here is a sequence of actions:
- Run the Vision Mixer C# sample.
- Create new project.
- Add two streams: background and foreground. It can be files, live streams or pictures.
- Press "Apply". Now you have 2 streams but if you'll choose one of them it will be played separately. Let's ceate a csene where this streams will be placed one above another.
- Select a "SIDE" scene in a scene list - we will modify it to create our scene. You see that you have both of your streams on the preview screen side-by-side. Now le's place them one above another.
- Choose the first rect in a rect list and press "Change rect" button.
- You see that Target Rectangle takes only a half of the output screen. Configure it for it took all the screen area (for example 720x576) and close the configuration window.
- Do the same with the second rect in a list.
- Here it is - you have one stream above another! Save this scene ("Add scene" button) to pass the configuration stage next time.
- Now you can configure the chroma key for the foreground stream (http://wiki.medialooks.com/How_can_I_test_your_chroma_key%3F). You will have a chromakeyed stream on a movie background.
